
AI智能摘要
本文记录了在 Jetson Orin Nano 上从源码编译并运行 Immich Machine Learning 模块的全过程,介绍了如何构建支持 CUDA 与 TensorRT 的 ONNX Runtime,解决编译依赖、内存不足等问题,并整理了常用环境变量与性能优化技巧,帮助在嵌入式平台上高效部署 GPU 加速的深度学习服务。
— 此摘要由AI分析文章内容生成,仅供参考。
本机实验配置 (Release中有编译好的whl)
编译环境准备
最新版ONNX需要 CMake > 3.28, GCC 11
升级 CMake
sudo apt purge cmake -y
sudo apt install -y apt-transport-https ca-certificates gnupg software-properties-common wget
wget -O - https://apt.kitware.com/keys/kitware-archive-latest.asc 2>/dev/null | \
  gpg --dearmor - | sudo tee /usr/share/keyrings/kitware-archive-keyring.gpg >/dev/null
echo 'deb [signed-by=/usr/share/keyrings/kitware-archive-keyring.gpg] https://apt.kitware.com/ubuntu/ jammy main' | \
  sudo tee /etc/apt/sources.list.d/kitware.list >/dev/null
sudo apt update
sudo apt install -y cmake
cmake --version

升级 GCC 到 11
sudo apt update
sudo apt install -y gcc-11 g++-11
sudo update-alternatives --install /usr/bin/gcc gcc /usr/bin/gcc-10 100
sudo update-alternatives --install /usr/bin/gcc gcc /usr/bin/gcc-11 110
sudo update-alternatives --install /usr/bin/g++ g++ /usr/bin/g++-10 100
sudo update-alternatives --install /usr/bin/g++ g++ /usr/bin/g++-11 110
gcc --version

编译ONNX
git clone --recursive https://github.com/microsoft/onnxruntime
cd onnxruntime
./build.sh --config Release \
  --update --build --parallel --build_wheel \
  --use_tensorrt --use_cuda \
  --cuda_home /usr/local/cuda \
  --cudnn_home /usr/lib/aarch64-linux-gnu \
  --tensorrt_home /usr/lib/aarch64-linux-gnu
编译到90%+会失败,不用担心,只是测试失败了,删除测试就好了(
rm -f onnxruntime/test/providers/cpu/nn/conv_fp16_test.cc
cmake --build build/Linux/Release --config Release -j$(nproc)
./build.sh --config Release \
  --update --build --parallel --build_wheel --skip_tests \
  --use_tensorrt --use_cuda \
  --cuda_home /usr/local/cuda \
  --cudnn_home /usr/lib/aarch64-linux-gnu \
  --tensorrt_home /usr/lib/aarch64-linux-gnu

安装并测试ONNXruntime-GPU
我这里使用的是UV管理环境
uv pip install ~/onnxruntime/build/Linux/Release/dist/onnxruntime_gpu-*

测试代码
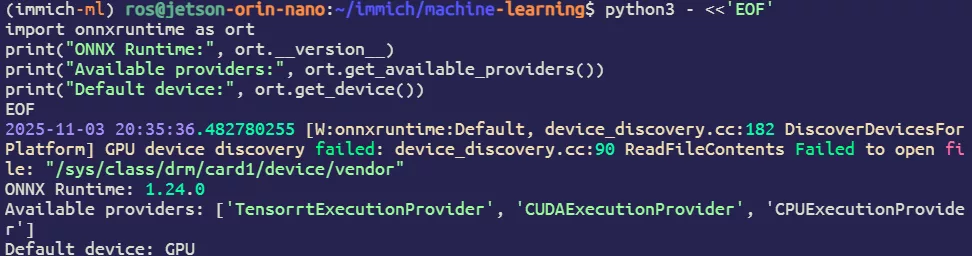
python3 - <<'EOF'
import onnxruntime as ort
print("ONNX Runtime:", ort.__version__)
print("Available providers:", ort.get_available_providers())
print("Default device:", ort.get_device())
EOF
恭喜 TensorRT 和 CUDA 都已启用加速(在Jetson平台上这条 W:警告⚠️可以忽略)
推理immich-machine-learning
安装UV
curl -LsSf https://astral.sh/uv/install.sh | sh
拉取代码
git clone https://github.com/immich-app/immich.git
cd immich/machine-learning
找到pyproject.toml修改依赖文件,将 cuda = ["onnxruntime-gpu>=1.17.0,<2"] 中的 -gpu 删掉,以及注释掉以下代码
#[[tool.uv.index]]
#name = "cuda12"
#url = "https://aiinfra.pkgs.visualstudio.com/PublicPackages/_packaging/#onnxruntime-cuda-12/pypi/simple/"
#explicit = true
#
#[tool.uv.sources]
#onnxruntime-gpu = { index = "cuda12" }
然后执行代码安装CPU版本的onnxruntime,目的是马上替换我们上面编译好的GPU版本
uv sync --extra cuda
source .venv/bin/activate
uv pip uninstall onnxruntime
uv pip install ~/onnxruntime/build/Linux/Release/dist/onnxruntime_gpu-*
在目录下新建一个.env就可以开始跑了
export MACHINE_LEARNING_GPU_ACCELERATION=cuda
export NVIDIA_VISIBLE_DEVICES=all
export IMMICH_PORT=3003
启动项目
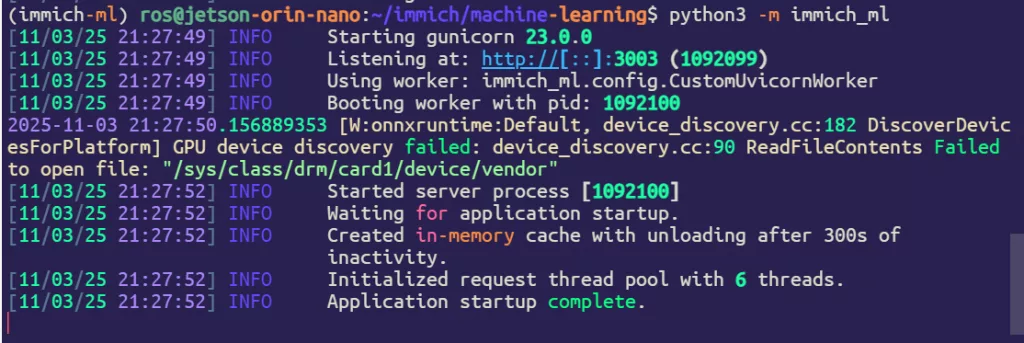
python3 -m immich_ml
Comments NOTHING