
AI智能摘要
本文介绍了基于雨云宁波地区服务器,使用Docker部署Headscale 0.26.1与HeadPlane 0.6.0的私有化组网方案。涵盖docker-compose安装、服务配置、域名与IP设置、TLS证书申请及反向代理配置。通过创建用户和预授权密钥实现设备接入,并支持MagicDNS、ACL策略及自建DERP节点优化连接。最终通过NGINX反向代理实现HTTPS访问HeadPlane控制台,完成对Tailscale兼容网络的可视化管理。
— 此摘要由AI分析文章内容生成,仅供参考。
本次使用的云服务商 雨云 宁波地区
Docker安装Headscale
首先先安装docker-compose
apt update
apt upgrade -y
apt install docker-compose
配置Headscale以及HeadPlane(仿Tailscale前端控制面板),文件位于/opt/headscale/docker-compose.yaml
version: '3'

services:
  headscale:
    image: headscale/headscale:0.26.1
    container_name: headscale
    command: serve
    restart: unless-stopped
    volumes:
      - /opt/headscale/config:/etc/headscale/
      - /opt/headscale/data:/var/lib/headscale/
    network_mode: host

  headplane:
    image: ghcr.nju.edu.cn/tale/headplane:0.6.0
    container_name: headplane
    restart: unless-stopped
    ports:
      - "8091:3000"
    volumes:
      - /opt/headscale/headplane/config.yaml:/etc/headplane/config.yaml

      # Headplane stores its data in this directory
      - /opt/headscale/headplane/headplane-data:/var/lib/headplane

      # If you are using the Docker integration, mount the Docker socket
      - /var/run/docker.sock:/var/run/docker.sock:ro
创建以下目录和文件后拉取一下镜像
touch /opt/headscale/config/config.yaml
touch /opt/headscale/config/extra-records.json
touch /opt/headscale/headplane/config.yaml
cd /opt/headscale
docker-compose up -d
然后配置/opt/headscale/config/config.yaml,务必修改“你的域名”和“你的IP”两个地方,其余可根据自己的需求修改
---
# headscale will look for a configuration file named `config.yaml` (or `config.json`) in the following order:
#
# - `/etc/headscale`
# - `~/.headscale`
# - current working directory

# The url clients will connect to.
# Typically this will be a domain like:
#
# https://myheadscale.example.com:443
#
server_url: https://你的域名:443

# Address to listen to / bind to on the server
#
# For production:
# listen_addr: 0.0.0.0:8080
listen_addr: 0.0.0.0:8080

# Address to listen to /metrics and /debug, you may want
# to keep this endpoint private to your internal network
metrics_listen_addr: 0.0.0.0:9090

# Address to listen for gRPC.
# gRPC is used for controlling a headscale server
# remotely with the CLI
# Note: Remote access _only_ works if you have
# valid certificates.
#
# For production:
# grpc_listen_addr: 0.0.0.0:50443
grpc_listen_addr: 0.0.0.0:50443

# Allow the gRPC admin interface to run in INSECURE
# mode. This is not recommended as the traffic will
# be unencrypted. Only enable if you know what you
# are doing.
grpc_allow_insecure: false

# The Noise section includes specific configuration for the
# TS2021 Noise protocol
noise:
  # The Noise private key is used to encrypt the traffic between headscale and
  # Tailscale clients when using the new Noise-based protocol. A missing key
  # will be automatically generated.
  private_key_path: /var/lib/headscale/noise_private.key

# List of IP prefixes to allocate tailaddresses from.
# Each prefix consists of either an IPv4 or IPv6 address,
# and the associated prefix length, delimited by a slash.
# It must be within IP ranges supported by the Tailscale
# client - i.e., subnets of 100.64.0.0/10 and fd7a:115c:a1e0::/48.
# See below:
# IPv6: https://github.com/tailscale/tailscale/blob/22ebb25e833264f58d7c3f534a8b166894a89536/net/tsaddr/tsaddr.go#LL81C52-L81C71
# IPv4: https://github.com/tailscale/tailscale/blob/22ebb25e833264f58d7c3f534a8b166894a89536/net/tsaddr/tsaddr.go#L33
# Any other range is NOT supported, and it will cause unexpected issues.
prefixes:
  v4: 100.17.0.0/10
  v6: fd7a:115c:a1e0::/48

  # Strategy used for allocation of IPs to nodes, available options:
  # - sequential (default): assigns the next free IP from the previous given IP.
  # - random: assigns the next free IP from a pseudo-random IP generator (crypto/rand).
  allocation: sequential

# DERP is a relay system that Tailscale uses when a direct
# connection cannot be established.
# https://tailscale.com/blog/how-tailscale-works/#encrypted-tcp-relays-derp
#
# headscale needs a list of DERP servers that can be presented
# to the clients.
derp:
  server:
    # If enabled, runs the embedded DERP server and merges it into the rest of the DERP config
    # The Headscale server_url defined above MUST be using https, DERP requires TLS to be in place
    enabled: true

    # Region ID to use for the embedded DERP server.
    # The local DERP prevails if the region ID collides with other region ID coming from
    # the regular DERP config.
    region_id: 999

    # Region code and name are displayed in the Tailscale UI to identify a DERP region
    region_code: "headscale"
    region_name: "Headscale Embedded DERP"

    # Listens over UDP at the configured address for STUN connections - to help with NAT traversal.
    # When the embedded DERP server is enabled stun_listen_addr MUST be defined.
    #
    # For more details on how this works, check this great article: https://tailscale.com/blog/how-tailscale-works/
    stun_listen_addr: "0.0.0.0:3478"

    # Private key used to encrypt the traffic between headscale DERP and
    # Tailscale clients. A missing key will be automatically generated.
    private_key_path: /var/lib/headscale/derp_server_private.key

    # This flag can be used, so the DERP map entry for the embedded DERP server is not written automatically,
    # it enables the creation of your very own DERP map entry using a locally available file with the parameter DERP.paths
    # If you enable the DERP server and set this to false, it is required to add the DERP server to the DERP map using DERP.paths
    automatically_add_embedded_derp_region: true

    # For better connection stability (especially when using an Exit-Node and DNS is not working),
    # it is possible to optionally add the public IPv4 and IPv6 address to the Derp-Map using:
    ipv4: 你的IP

  # List of externally available DERP maps encoded in JSON
  urls:
    - https://controlplane.tailscale.com/derpmap/default

  # Locally available DERP map files encoded in YAML
  #
  # This option is mostly interesting for people hosting
  # their own DERP servers:
  # https://tailscale.com/kb/1118/custom-derp-servers/
  #
  # paths:
  #   - /etc/headscale/derp-example.yaml
  #paths: ["/etc/headscale/derp.yaml"]

  # If enabled, a worker will be set up to periodically
  # refresh the given sources and update the derpmap
  # will be set up.
  auto_update_enabled: true

  # How often should we check for DERP updates?
  update_frequency: 24h

# Disables the automatic check for headscale updates on startup
disable_check_updates: false

# Time before an inactive ephemeral node is deleted?
ephemeral_node_inactivity_timeout: 30m

database:
  # Database type. Available options: sqlite, postgres
  # Please note that using Postgres is highly discouraged as it is only supported for legacy reasons.
  # All new development, testing and optimisations are done with SQLite in mind.
  type: sqlite

  # Enable debug mode. This setting requires the log.level to be set to "debug" or "trace".
  debug: false

  # GORM configuration settings.
  gorm:
    # Enable prepared statements.
    prepare_stmt: true

    # Enable parameterized queries.
    parameterized_queries: true

    # Skip logging "record not found" errors.
    skip_err_record_not_found: true

    # Threshold for slow queries in milliseconds.
    slow_threshold: 1000

  # SQLite config
  sqlite:
    path: /var/lib/headscale/db.sqlite

    # Enable WAL mode for SQLite. This is recommended for production environments.
    # https://www.sqlite.org/wal.html
    write_ahead_log: true

    # Maximum number of WAL file frames before the WAL file is automatically checkpointed.
    # https://www.sqlite.org/c3ref/wal_autocheckpoint.html
    # Set to 0 to disable automatic checkpointing.
    wal_autocheckpoint: 1000

  # # Postgres config
  # Please note that using Postgres is highly discouraged as it is only supported for legacy reasons.
  # See database.type for more information.
  # postgres:
  #   # If using a Unix socket to connect to Postgres, set the socket path in the 'host' field and leave 'port' blank.
  #   host: localhost
  #   port: 5432
  #   name: headscale
  #   user: foo
  #   pass: bar
  #   max_open_conns: 10
  #   max_idle_conns: 10
  #   conn_max_idle_time_secs: 3600

  #   # If other 'sslmode' is required instead of 'require(true)' and 'disabled(false)', set the 'sslmode' you need
  #   # in the 'ssl' field. Refers to https://www.postgresql.org/docs/current/libpq-ssl.html Table 34.1.
  #   ssl: false

### TLS configuration
#
## Let's encrypt / ACME
#
# headscale supports automatically requesting and setting up
# TLS for a domain with Let's Encrypt.
#
# URL to ACME directory
acme_url: https://acme-v02.api.letsencrypt.org/directory

# Email to register with ACME provider
acme_email: ""

# Domain name to request a TLS certificate for:
tls_letsencrypt_hostname: ""

# Path to store certificates and metadata needed by
# letsencrypt
# For production:
tls_letsencrypt_cache_dir: /var/lib/headscale/cache

# Type of ACME challenge to use, currently supported types:
# HTTP-01 or TLS-ALPN-01
# See: docs/ref/tls.md for more information
tls_letsencrypt_challenge_type: HTTP-01
# When HTTP-01 challenge is chosen, letsencrypt must set up a
# verification endpoint, and it will be listening on:
# :http = port 80
tls_letsencrypt_listen: ":http"

## Use already defined certificates:
tls_cert_path: ""
tls_key_path: ""

log:
  # Output formatting for logs: text or json
  format: text
  level: info

## Policy
# headscale supports Tailscale's ACL policies.
# Please have a look to their KB to better
# understand the concepts: https://tailscale.com/kb/1018/acls/
policy:
  # The mode can be "file" or "database" that defines
  # where the ACL policies are stored and read from.
  mode: database
  # If the mode is set to "file", the path to a
  # HuJSON file containing ACL policies.
  #path: "/etc/headscale/acl.hujson"

## DNS
#
# headscale supports Tailscale's DNS configuration and MagicDNS.
# Please have a look to their KB to better understand the concepts:
#
# - https://tailscale.com/kb/1054/dns/
# - https://tailscale.com/kb/1081/magicdns/
# - https://tailscale.com/blog/2021-09-private-dns-with-magicdns/
#
# Please note that for the DNS configuration to have any effect,
# clients must have the `--accept-dns=true` option enabled. This is the
# default for the Tailscale client. This option is enabled by default
# in the Tailscale client.
#
# Setting _any_ of the configuration and `--accept-dns=true` on the
# clients will integrate with the DNS manager on the client or
# overwrite /etc/resolv.conf.
# https://tailscale.com/kb/1235/resolv-conf
#
# If you want stop Headscale from managing the DNS configuration
# all the fields under `dns` should be set to empty values.
dns:
  # Whether to use [MagicDNS](https://tailscale.com/kb/1081/magicdns/).
  magic_dns: true

  # Defines the base domain to create the hostnames for MagicDNS.
  # This domain _must_ be different from the server_url domain.
  # `base_domain` must be a FQDN, without the trailing dot.
  # The FQDN of the hosts will be
  # `hostname.base_domain` (e.g., _myhost.example.com_).
  base_domain: ts.net

  # Whether to use the local DNS settings of a node (default) or override the
  # local DNS settings and force the use of Headscale's DNS configuration.
  override_local_dns: false

  # List of DNS servers to expose to clients.
  nameservers:
    #global:
    #  - 1.1.1.1
    #  - 1.0.0.1
    #  - 2606:4700:4700::1111
    #  - 2606:4700:4700::1001

      # NextDNS (see https://tailscale.com/kb/1218/nextdns/).
      # "abc123" is example NextDNS ID, replace with yours.
      # - https://dns.nextdns.io/abc123

    # Split DNS (see https://tailscale.com/kb/1054/dns/),
    # a map of domains and which DNS server to use for each.
    #split:
    #  {}
      # foo.bar.com:
      #   - 1.1.1.1
      # darp.headscale.net:
      #   - 1.1.1.1
      #   - 8.8.8.8

  # Set custom DNS search domains. With MagicDNS enabled,
  # your tailnet base_domain is always the first search domain.
  #search_domains: []

  # Extra DNS records
  # so far only A and AAAA records are supported (on the tailscale side)
  # See: docs/ref/dns.md
  #extra_records: []
  #   - name: "grafana.myvpn.example.com"
  #     type: "A"
  #     value: "100.64.0.3"
  #
  #   # you can also put it in one line
  #   - { name: "prometheus.myvpn.example.com", type: "A", value: "100.64.0.3" }
  #
  # Alternatively, extra DNS records can be loaded from a JSON file.
  # Headscale processes this file on each change.
  extra_records_path: /etc/headscale/extra-records.json

# Unix socket used for the CLI to connect without authentication
# Note: for production you will want to set this to something like:
unix_socket: /var/run/headscale/headscale.sock
unix_socket_permission: "0770"
#
# headscale supports experimental OpenID connect support,
# it is still being tested and might have some bugs, please
# help us test it.
# OpenID Connect
# oidc:
#   only_start_if_oidc_is_available: true
#   issuer: "https://your-oidc.issuer.com/path"
#   client_id: "your-oidc-client-id"
#   client_secret: "your-oidc-client-secret"
#   # Alternatively, set `client_secret_path` to read the secret from the file.
#   # It resolves environment variables, making integration to systemd's
#   # `LoadCredential` straightforward:
#   client_secret_path: "${CREDENTIALS_DIRECTORY}/oidc_client_secret"
#   # client_secret and client_secret_path are mutually exclusive.
#
#   # The amount of time from a node is authenticated with OpenID until it
#   # expires and needs to reauthenticate.
#   # Setting the value to "0" will mean no expiry.
#   expiry: 180d
#
#   # Use the expiry from the token received from OpenID when the user logged
#   # in, this will typically lead to frequent need to reauthenticate and should
#   # only been enabled if you know what you are doing.
#   # Note: enabling this will cause `oidc.expiry` to be ignored.
#   use_expiry_from_token: false
#
#   # Customize the scopes used in the OIDC flow, defaults to "openid", "profile" and "email" and add custom query
#   # parameters to the Authorize Endpoint request. Scopes default to "openid", "profile" and "email".
#
#   scope: ["openid", "profile", "email", "custom"]
#   extra_params:
#     domain_hint: example.com
#
#   # List allowed principal domains and/or users. If an authenticated user's domain is not in this list, the
#   # authentication request will be rejected.
#
#   allowed_domains:
#     - example.com
#   # Note: Groups from keycloak have a leading '/'
#   allowed_groups:
#     - /headscale
#   allowed_users:
#     - alice@example.com
#
#   # Optional: PKCE (Proof Key for Code Exchange) configuration
#   # PKCE adds an additional layer of security to the OAuth 2.0 authorization code flow
#   # by preventing authorization code interception attacks
#   # See https://datatracker.ietf.org/doc/html/rfc7636
#   pkce:
#     # Enable or disable PKCE support (default: false)
#     enabled: false
#     # PKCE method to use:
#     # - plain: Use plain code verifier
#     # - S256: Use SHA256 hashed code verifier (default, recommended)
#     method: S256
#
#   # Map legacy users from pre-0.24.0 versions of headscale to the new OIDC users
#   # by taking the username from the legacy user and matching it with the username
#   # provided by the OIDC. This is useful when migrating from legacy users to OIDC
#   # to force them using the unique identifier from the OIDC and to give them a
#   # proper display name and picture if available.
#   # Note that this will only work if the username from the legacy user is the same
#   # and there is a possibility for account takeover should a username have changed
#   # with the provider.
#   # When this feature is disabled, it will cause all new logins to be created as new users.
#   # Note this option will be removed in the future and should be set to false
#   # on all new installations, or when all users have logged in with OIDC once.
#   map_legacy_users: false

# Logtail configuration
# Logtail is Tailscales logging and auditing infrastructure, it allows the control panel
# to instruct tailscale nodes to log their activity to a remote server.
logtail:
  # Enable logtail for this headscales clients.
  # As there is currently no support for overriding the log server in headscale, this is
  # disabled by default. Enabling this will make your clients send logs to Tailscale Inc.
  enabled: false

# Enabling this option makes devices prefer a random port for WireGuard traffic over the
# default static port 41641. This option is intended as a workaround for some buggy
# firewall devices. See https://tailscale.com/kb/1181/firewalls/ for more information.
randomize_client_port: true
配置Headscale
Headscale 控制示例
docker exec -it headscale \
  headscale preauthkeys --help
创建用户,(注意用户下面可以放很多设备,这里的是用户名不是设备名
docker exec -it headscale \
  headscale users create 你的英文名
创建一个属于第一个用户的长达十年的密钥用于设备认证
docker exec -it headscale \
  headscale preauthkeys create --user 1 --reusable --expiration 10y
创建apikey用于前端的认证
docker exec -it headscale \
  headscale apikeys create
配置HeadPlane
配置 /opt/headscale/headplane/config.yaml,需要配置如下字段
- server: cookie_secret
- headscale: url
- integration: pre_authkey
# Configuration for the Headplane server and web application
server:
  host: "0.0.0.0"
  port: 3000

  # The secret used to encode and decode web sessions
  # Ensure that this is exactly 32 characters long
  cookie_secret: "随机生成一个32位的密码"

  # Should the cookies only work over HTTPS?
  # Set to false if running via HTTP without a proxy
  # (I recommend this is true in production)
  cookie_secure: true

# Headscale specific settings to allow Headplane to talk
# to Headscale and access deep integration features
headscale:
  # The URL to your Headscale instance
  # (All API requests are routed through this URL)
  # (THIS IS NOT the gRPC endpoint, but the HTTP endpoint)
  #
  # IMPORTANT: If you are using TLS this MUST be set to `https://`
  url: "https://你的域名"

  # If you use the TLS configuration in Headscale, and you are not using
  # Let's Encrypt for your certificate, pass in the path to the certificate.
  # (This has no effect `url` does not start with `https://`)
  # tls_cert_path: "/var/lib/headplane/tls.crt"

  # Optional, public URL if they differ
  # This affects certain parts of the web UI
  # public_url: "https://headscale.example.com"

  # Path to the Headscale configuration file
  # This is optional, but HIGHLY recommended for the best experience
  # If this is read only, Headplane will show your configuration settings
  # in the Web UI, but they cannot be changed.
  config_path: "/etc/headscale/config.yaml"

  # Headplane internally validates the Headscale configuration
  # to ensure that it changes the configuration in a safe way.
  # If you want to disable this validation, set this to false.
  config_strict: true

  # If you are using `dns.extra_records_path` in your Headscale
  # configuration, you need to set this to the path for Headplane
  # to be able to read the DNS records.
  #
  # Pass it in if using Docker and ensure that the file is both
  # readable and writable to the Headplane process.
  # When using this, Headplane will no longer need to automatically
  # restart Headscale for DNS record changes.
  # dns_records_path: "/var/lib/headplane/extra_records.json"

# Integration configurations for Headplane to interact with Headscale
integration:
  agent:
    # The Headplane agent allows retrieving information about nodes
    # This allows the UI to display version, OS, and connectivity data
    # You will see the Headplane agent in your Tailnet as a node when
    # it connects.
    enabled: true
    # To connect to your Tailnet, you need to generate a pre-auth key
    # This can be done via the web UI or through the `headscale` CLI.
    pre_authkey: "刚刚在Headscale生成的apikey"
    # Optionally change the name of the agent in the Tailnet.
    # host_name: "headplane-agent"

    # Configure different caching settings. By default, the agent will store
    # caches in the path below for a maximum of 1 minute. If you want data
    # to update faster, reduce the TTL, but this will increase the frequency
    # of requests to Headscale.
    # cache_ttl: 60
    # cache_path: /var/lib/headplane/agent_cache.json

    # Do not change this unless you are running a custom deployment.
    # The work_dir represents where the agent will store its data to be able
    # to automatically reauthenticate with your Tailnet. It needs to be
    # writable by the user running the Headplane process.
    # work_dir: "/var/lib/headplane/agent"

  # Only one of these should be enabled at a time or you will get errors
  # This does not include the agent integration (above), which can be enabled
  # at the same time as any of these and is recommended for the best experience.
  docker:
    enabled: false

    # By default we check for the presence of a container label (see the docs)
    # to determine the container to signal when changes are made to DNS settings.
    container_label: "me.tale.headplane.target=headscale"

    # HOWEVER, you can fallback to a container name if you desire, but this is
    # not recommended as its brittle and doesn't work with orchestrators that
    # automatically assign container names.
    #
    # If `container_name` is set, it will override any label checks.
    # container_name: "headscale"

    # The path to the Docker socket (do not change this if you are unsure)
    # Docker socket paths must start with unix:// or tcp:// and at the moment
    # https connections are not supported.
    socket: "unix:///var/run/docker.sock"

  # Please refer to docs/integration/Kubernetes.md for more information
  # on how to configure the Kubernetes integration. There are requirements in
  # order to allow Headscale to be controlled by Headplane in a cluster.
  kubernetes:
    enabled: false
    # Validates the manifest for the Pod to ensure all of the criteria
    # are set correctly. Turn this off if you are having issues with
    # shareProcessNamespace not being validated correctly.
    validate_manifest: true
    # This should be the name of the Pod running Headscale and Headplane.
    # If this isn't static you should be using the Kubernetes Downward API
    # to set this value (refer to docs/Integrated-Mode.md for more info).
    pod_name: "headscale"

  # Proc is the "Native" integration that only works when Headscale and
  # Headplane are running outside of a container. There is no configuration,
  # but you need to ensure that the Headplane process can terminate the
  # Headscale process.
  #
  # (If they are both running under systemd as sudo, this will work).
  proc:
    enabled: false

# OIDC Configuration for simpler authentication
# (This is optional, but recommended for the best experience)
oidc:
  issuer: "https://accounts.google.com"
  client_id: "your-client-id"

  # The client secret for the OIDC client
  # Either this or `client_secret_path` must be set for OIDC to work
  client_secret: "<your-client-secret>"
  # You can alternatively set `client_secret_path` to read the secret from disk.
  # The path specified can resolve environment variables, making integration
  # with systemd's `LoadCredential` straightforward:
  # client_secret_path: "${CREDENTIALS_DIRECTORY}/oidc_client_secret"

  disable_api_key_login: false
  token_endpoint_auth_method: "client_secret_post"

  # If you are using OIDC, you need to generate an API key
  # that can be used to authenticate other sessions when signing in.
  #
  # This can be done with `headscale apikeys create --expiration 999d`
  headscale_api_key: "<your-headscale-api-key>"

  # Optional, but highly recommended otherwise Headplane
  # will attempt to automatically guess this from the issuer
  #
  # This should point to your publicly accessibly URL
  # for your Headplane instance with /admin/oidc/callback
  redirect_uri: "http://localhost:3000/admin/oidc/callback"

  # Stores the users and their permissions for Headplane
  # This is a path to a JSON file, default is specified below.
  user_storage_file: "/var/lib/headplane/users.json"
重启一下容器,看一下logs没问题就跑起来了
配置反向代理
安装NGINX
apt install nginx配置服务 /etc/nginx/conf.d/headscale.conf
server {
        server_name 你的域名;

        # Security / XSS Mitigation Headers
        add_header X-Frame-Options "SAMEORIGIN";
        add_header X-XSS-Protection "1; mode=block";
        add_header X-Content-Type-Options "nosniff";

        location /admin {
            proxy_redirect off;
            proxy_set_header Host $host;
            proxy_set_header X-Real-IP $remote_addr;
            proxy_set_header X-Forwarded-For $proxy_add_x_forwarded_for;
            proxy_pass http://127.0.0.1:8091;
        }

        location / {
            proxy_pass http://127.0.0.1:8080;
            proxy_http_version 1.1;
            proxy_set_header Upgrade $http_upgrade;
            proxy_set_header Connection "upgrade";
            proxy_set_header Host $host;
            proxy_redirect http:// https://;
            proxy_buffering off;
            proxy_set_header X-Real-IP $remote_addr;
            proxy_set_header X-Forwarded-For $proxy_add_x_forwarded_for;
            proxy_set_header X-Forwarded-Proto $http_x_forwarded_proto;
            add_header Strict-Transport-Security "max-age=15552000; includeSubDomains" always;
        }

        listen 443 ssl;
        listen [::]:443 ssl;
        ssl_certificate /root/.acme.sh/你的证书;
        ssl_certificate_key /root/.acme.sh/你的证书密钥;

}
server {
    if ($host = 你的域名) {
        return 301 https://$host$request_uri;
    } # managed by Certbot


    listen 80;
    listen [::]:80;
    server_name 你的域名;
    return 404;
}
应用配置
nginx -t
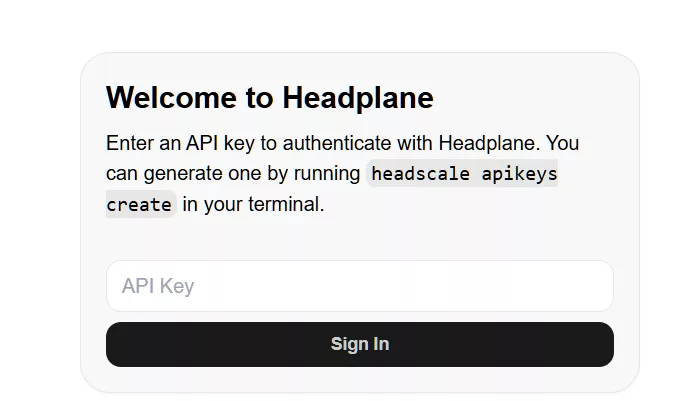
systemctl reload nginx访问HeadPlane控制台
http://你的域名/damin,输入之前生成的apikey
使用预授权密钥认证设备
不管是Win端还是Linux端都是先在官网安装软件Download | Tailscale,然后在控制台输入
tailscale up --login-server https://你的域名 --authkey 生成的十年密钥进阶配置
自建derp配置文件示例 /opt/headscale/config/derp.yaml
regions:
  901:
    regionid: 901
    regioncode: cn-cd
    regionname: 中国-成都
    nodes:
      - name: 1
        regionid: 901
        hostname: 221.0.0.0
        ipv4: 221.0.0.0
        stunport: 34788
        stunonly: false
        derpport: 64500
        insecurefortests: true
自建derp的compose文件(注意Headscale端自带 不需要另外装derp 但必须启用https),首先先安装一个tailscale,然后通过预授权密钥登录,即可实现防偷
services:
  derp:
    image: ghcr.nju.edu.cn/yangchuansheng/ip_derper:latest
    container_name: derp
    restart: always
    ports:
      - "64500:64500"
      - "64500:64500/udp"
      - "34788:3478/udp" # 3478 为默认stun端口,如果不冲突请勿修改
    volumes:
      - /var/run/tailscale/tailscaled.sock:/var/run/tailscale/tailscaled.sock # 映射本地 tailscale 客户端验证连接,用来验证是否被偷
    environment:
      - DERP_ADDR=:64500 # 此处需要与上面的同步修改
      - DERP_CERTS=/app/certs
      - DERP_VERIFY_CLIENTS=true # 启动客户端验证,这是防偷的最重要的参数
Magic DNS自定义配置示例 /opt/headscale/config/extra-records.json
[
  {
    "name": "shattered-pc.ts.net",
    "type": "A",
    "value": "100.0.0.1"
  },
  {
    "name": "dmj-server.ts.net",
    "type": "A",
    "value": "100.0.0.11"
  }
]
ACL ? ?
未完待续~hh
Comments NOTHING