
AI智能摘要
文章介绍了在Ubuntu24.04系统上安装多个CUDA版本的步骤,重点如何在安装CUDA12.8时不安装驱动,并通过配置环境变量实现CUDA12.8与12.9的共存。用户需手动修改`.bashrc`文件,设置不同版本的别名,并切换默认版本。最后,可以通过`nvcc--version`命令验证当前使用的CUDA版本。安装过程中需注意依赖关系,确保驱动版本不低于570.00以支持CUDA12.8的运行。
— 此摘要由AI分析文章内容生成,仅供参考。
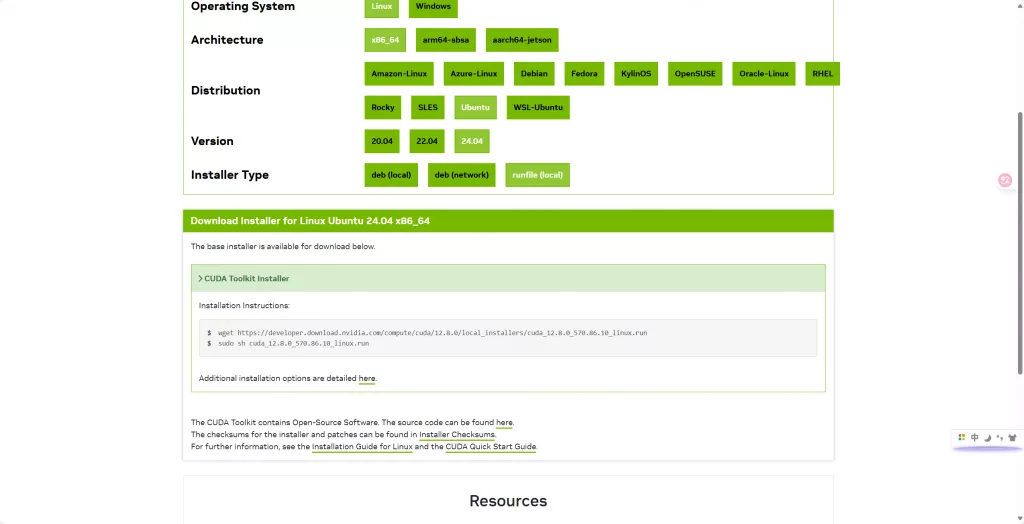
进入官方下载页,确认版本无误后开始下载安装
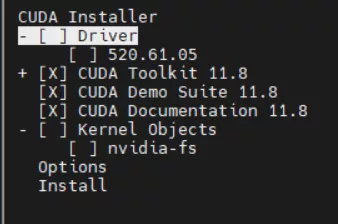
按空格取消第一个选项(驱动)的勾选,然后选择Install,下一步会出现yes or no选择no
等待出现以下代码表示安装成功
===========
= Summary =
===========

Driver:   Not Selected
Toolkit:  Installed in /usr/local/cuda-12.8/

Please make sure that
 -   PATH includes /usr/local/cuda-12.8/bin
 -   LD_LIBRARY_PATH includes /usr/local/cuda-12.8/lib64, or, add /usr/local/cuda-12.8/lib64 to /etc/ld.so.conf and run ldconfig as root

To uninstall the CUDA Toolkit, run cuda-uninstaller in /usr/local/cuda-12.8/bin
***WARNING: Incomplete installation! This installation did not install the CUDA Driver. A driver of version at least 570.00 is required for CUDA 12.8 functionality to work.
To install the driver using this installer, run the following command, replacing <CudaInstaller> with the name of this run file:
    sudo <CudaInstaller>.run --silent --driver

Logfile is /var/log/cuda-installer.log
然后我们需要配置环境变量以确保两个cuda的共存
sudo vim ~/.bashrc添加以下内容来设置
alias cuda128='export PATH=/usr/local/cuda-12.8/bin:$PATH; export LD_LIBRARY_PATH=/usr/local/cuda-12.8/lib64:$LD_LIBRARY_PATH'
alias cuda129='export PATH=/usr/local/cuda-12.9/bin:$PATH; export LD_LIBRARY_PATH=/usr/local/cuda-12.9/lib64:$LD_LIBRARY_PATH'
修改以下内容选择你需要默认的cuda版本12.8就替换掉下面的12.9
export PATH=/usr/local/cuda-12.9/bin:$PATH
export LD_LIBRARY_PATH=/usr/local/cuda-12.9/lib64:$LD_LIBRARY_PATH
验证
nvcc --version
cuda128
nvcc --version
cuda129
nvcc --version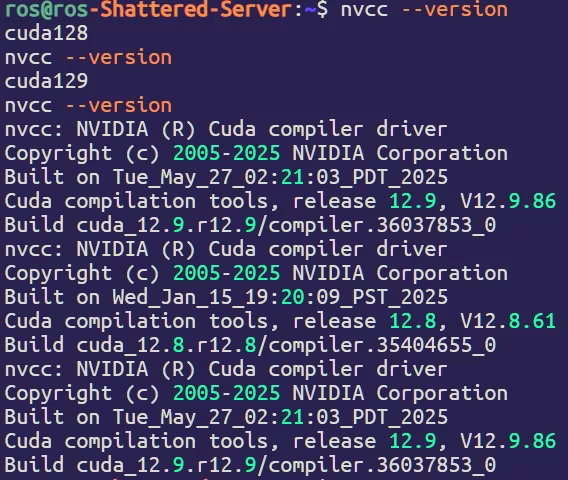
Comments NOTHING